 Hive Shell - ultimate tool for remote access to your workers

About Hive Shell
Almost a year ago Hive OS introduced the function of remote access to workers via Teleconsole. This service immediately became very popular among our users for solving various remote maintenance tasks.
Unfortunately, it has become very difficult to use this service lately because of instability in the service’s work, so the Hive team has begun to look for an alternative solution, which we are very pleased to present to you.
Introducing Hive Shell.
Hive Shell - provides remote access to your workers using the Hive OS network infrastructure, and also has its own unique features such as access via an SSH client and console sharing.
Let’s take a closer look at Hive Shell.
How to use Hive Shell
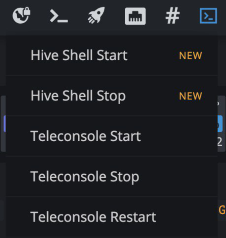
In the web interface in the “Remote Access” menu ![]() there are two items “Hive Shell Start” and “Hive Shell Stop”.
there are two items “Hive Shell Start” and “Hive Shell Stop”.
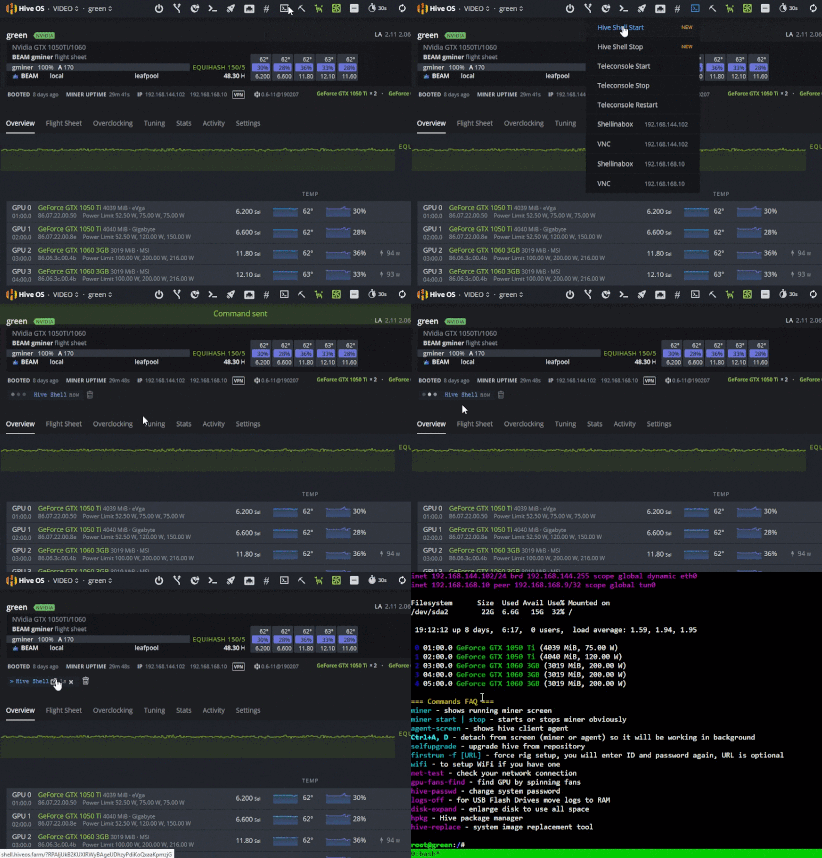
After starting the service through the menu item “Hive Shell Start” you will see the result of the command ![]()
The result of this command is a clickable link ![]() , clicking on which in the browser tab will open the terminal of the worker.
, clicking on which in the browser tab will open the terminal of the worker.
You can also open the result of the command execution to take advantage of additional command features such as sending a web link to a technician or connecting using an SSH client (which will be discussed separately).
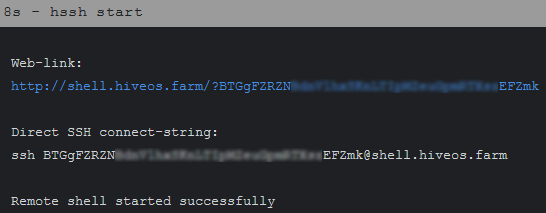
Attention! Send the access link to your worker only to a person you trust.
So it works
Run from console
Hive Shell can be launched both from the web interface and from the console. From the Hive Shell console, start the hssh command (valid parameters start | stop | restart).
Start service
hssh start
Stop service
hssh stop
Restart service
hssh restart
Console sharing
A very important feature of Hive Shell is the ability to share the console. You can watch (or even take part) the actions that are performed by the person with whom you have shared access to the worker through Hive Shell.
Using this function is extremely simple - just open the same link that was shared with another person.
This is how it looks (on the left - Hive Shell is launched in the FireFox browser, on the right - via the PuTTY client):
All actions performed in one console are also displayed in the other.
Using SSH client
With Hive Shell, you can connect to your worker using an SSH client such as PuTTY.
Private key generation
To do this, you need to perform a one-time procedure - generate your private keys which can be done by using the program that is part of the PuTTY package - PuTTYgen (PuTTY Key Generator)
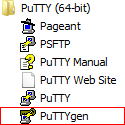
Start PuTTYgen and click the “Generate” button, randomly move the mouse cursor over the application field until the progress bar reaches the end.
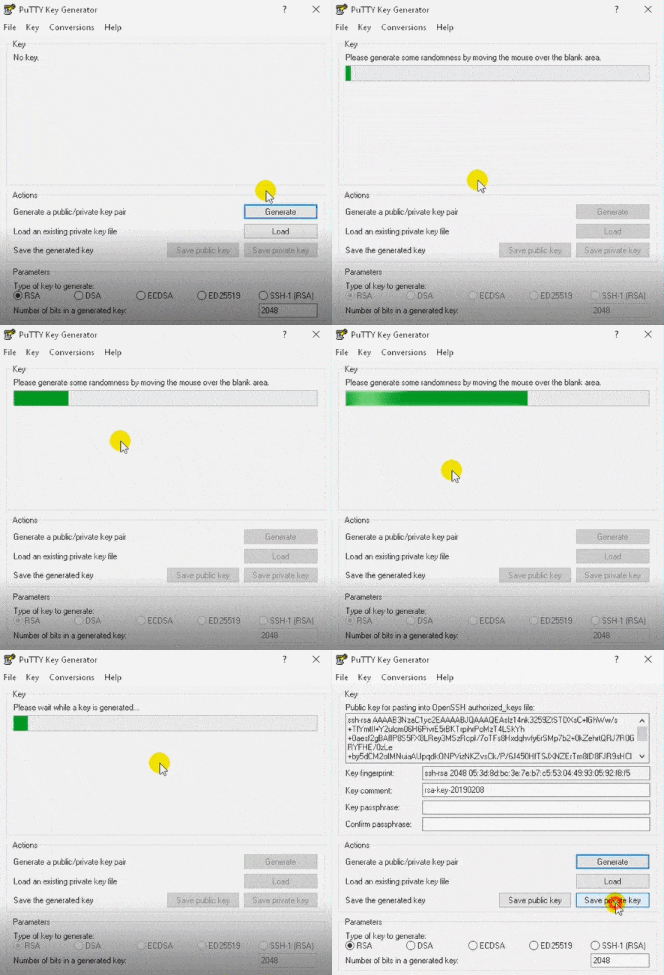
Then click the “Save private key” button, you can ignore the warning about saving without a password by clicking “Yes” and save the key on your computer.
Configure SSH Client
Next, you need to configure your SSH client using the generated private key.
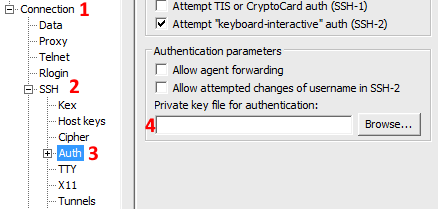
Run PuTTY, open the Connection section on the left and the SSH subsection in it and get Auth, on the right there will be a file selection menu where we need to select the private key saved in the previous step.
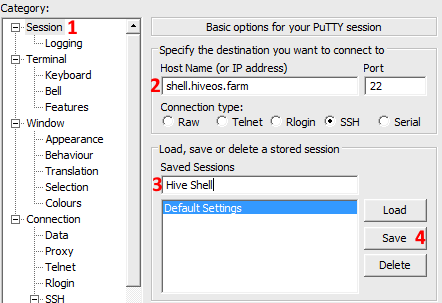
After that go to the Session section and save our profile. To do this, set the Host Name - shell.hiveos.farm and the name of the profile, for example - Hive Shell and press the" Save "button to save.
In short, it looks like this:
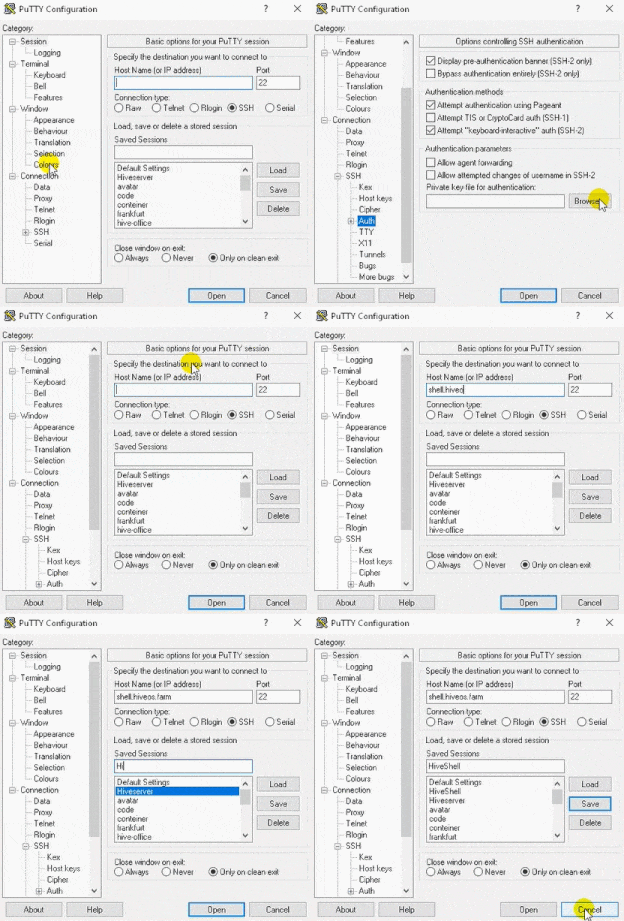
Launch PuTTY
The next step is very simple.
- start Hive Shell and wait for a successful start

- open the result of the command
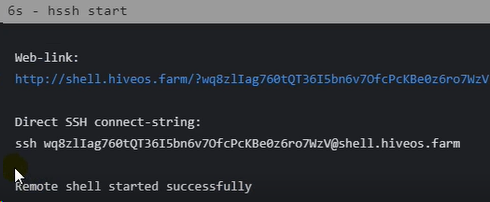
- copy session name Hive Shell
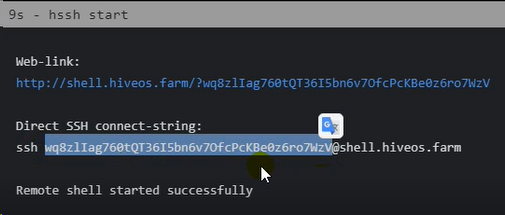
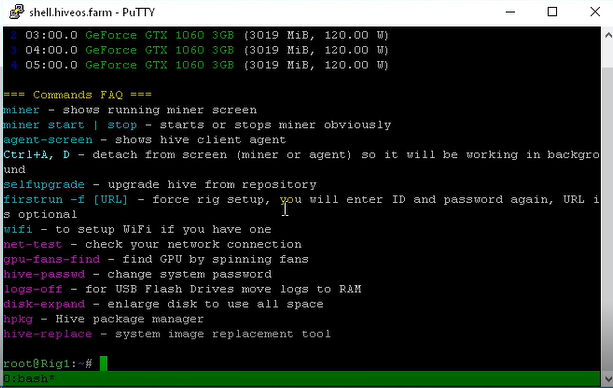
- launch PuTTY, open the previously saved Hive Shell profile and, using the right mouse button, insert the saved session name as the user name
 and hit Enter
 - that’s it! Pretty simple, isn’t it?

 Hive Shell - средство удаленного доступа к вашим воркерам
 : FAQ
: FAQ ЧаВо
ЧаВо